The Making of a One of a King Doll

This blog focuses on taking a production doll and changing her into a a One of a Kind (OOAK) doll.

Monday, June 30, 2014

Summer of Silkstones:

Summer is here! I love summer and I hate summer. I hate hot weather, lots of sun, and long days. (Until I moved to the Great Northwest I had no idea it didn't get dark until 10pm. ) But I don't homeschool during the summer and I have free time. (Well as much free time as a mom to 5 can have.)

I've been busy working on some new dolls. Every time I get a spare moment and sneak away to work on my dolls I wonder why I don't do it more often.

So here are my "new" girls.

Gala Gown: She is just a redress. I purchased her nude because I'm not a gown person.


Next up: Luncheon Ensemble

 She hasn't been repainted, but I have "fixed" her hair. Fashion Luncheon had these strange sideburn on the side of her face. The promo pictures from Mattel showed "curls" but my doll's side burns weren't curly at all. I removed the sideburns, re-rooted the missing plugs with a similar color and gave her a subtle restyle:

45th Anniversary in 2011 Convention Dress: I found this great dress from the 2011 National Barbie Convention on eBay.  I really love the dress so  I found and restyled a 45th Anniversary Silkstone  to show it off. 


And last but not least is a repaint and restyle. This doll was a 2014 Fiorella Silkstone. She has been enhanced by me. I removed her bottom lashes. I added a small amount of brown to her eye crease. I slightly enlarged her iris and deepened the color. And finally I add a shadow to her lip crease. Her hair has been slightly altered from its original style. I left the original style alone and pulled the two sides up into a twist.


Thanks for stopping in!


Monday, September 2, 2013

A Tale of 3 dolls!

I've been busy this week. I was able to finish 3 dolls and work on several others.

Doll #1:
First up is a Dawn of the Dance Frankie Stein. She is the second doll I "trolled" with yarn.  I used a black and white mixed yarn, that I had originally purchase to troll the CAM Witch. However once I saw Frankie sitting there, I knew she was next in line.

Here is her before and after:


Frankie has different colored eyes. I'm not sure if I'll ever attempt that again. It was very hard for me to get them  even.


I love my new Frankie! She has such sass and attitude.
Frankie received "trolled" yarn hair. And a brand new face with acrylic paints.  

The before and after picture is from:  http://www.picmonkey.com/

And Frankie's cute dress is from the ebay seller:  Wearable Art for Dolls 

Doll #2: 
Next up is a Ghoulia Yelps OOAK.  Ghoulia is my favorite monster High Character. She is the reason I finally started buying Monster High Dolls. I liked the First Wave dolls but not enough to buy them, but then ghoulia came out and I was hooked. 

A couple of months ago I purchased a repainted Ghoulia head (in a lot of parts) from my favorite Monster High doll artist :  Ebay Seller: ravendollz . There was 1 tiny little problem, the head had orange eyes. And I didn't like the Orange eyes. Now normally I don't change other artist's work. I think doll artists work very hard on their dolls and they should stay "as is". I was hoping I would like the head better in person, but alas I didn't. So this week after months of sitting in a drawer, I repainted Ghoulia's eyes: 


 I "forgot" to take a before. (I'm trying to remember, but I often dive in to my projects when I get a spare minute or two.  However I love the way she looks now! I didn't change anything except the color of her irises and pupils. I tried to stay true to ravendollz's vision, and was careful to work within the lines of her painting.
This dress is from the etsy seller: Rosie's Runaway by MoreMeKnow , I've purchased several dresses from this seller and have had nothing but good experiences.

Doll #3

My last "finished" doll this week is another Ravendollz creation.

I got this lot from ravendollz this week:
Picture by ravendollz 

It is a really great lot! It included THREE repainted dolls/doll heads. The Rochelle Goyle is on my shelf, waiting for a hair appointment and a new outfit, the Robecca head already has a new body and she is being styled and having a few accessories made. (And waiting for a new outfit.). The Cleo head and body, have been repaired and the "new" doll is on my shelf, waiting for inspiration to strike. The Rochelle head has been wiped clean and is in the middle of a repaint. (Like I said I've been working.......) That leaves the Spectra head. I was really excited to get this head.  I couldn't wait to "troll" her. I started by removing all the hair from her head. And that nearly finished this project. The glue that Mattel uses in the Monster High heads is evil! Evil! Very, very, super evil! I was super careful and tried to keep my fingers away from Spectra's face, however that was nearly impossible and by the time I was done part of her facepaint was missing...... Gone. But I trolled her hair and did my best to repair the paint job. Try as I might, I could not get the vertical black lines under her eyes to look right, so I gave up and removed them both. And the black paint I use is a little more rich, then the paint ravendollz used. It took some time, but I'm happy with the way she turned out. 
She is completely different from any doll that I would create, however that is the point of buying OOAK's dolls from other artists. 
Her dress is a StarDoll dress that I purchased from Goodwill and cut down to fit the Monster High dolls.


Thank you for reading! I have several more dolls in progress, that I hope to post soon. School is starting this week, so I'm not sure that I will have a ton of time homeschooling my trio, however I will sneak away as I can.


Saturday, August 24, 2013

Hi Everyone,

It has been FOREVER! Forever and ever! It has been a really long time since I posted everything. And I have no excuse except for my 5 boys and homeschooling and well LIFE has gotten into the way of my creations.

However I recently finished making one of our "extra" bedrooms into an office and I have been spending all my spare time in there working.

I have been bitten HARD by the Monster High bug. I prefer collecting them to ALL other dolls right now. I still try and pick up a Barbie or Fashion Royalty doll from time to time but honestly I just prefer Monster High dolls.

I have been collecting supplies and items and S-L-O-W-L-Y rerooting a Monster High Create a Monster. However a "friend" sent me the instructions for "Trolling" hair. And I finally got up the courage to try it. Trolling is completely different from any "rerooting" technique I've ever tried. You take hot glue and yarn or mohair and GLUE it on the doll's head.

I will now show you my newest creation

Before:

This is a Draculaura Doll. She came in the 1st Clawd and Draculaura Gift Set. At this point you can see I have removed all of her hair.

And her she is today:

Draculaura has been repainted and had her hair "trolled". I love the way she turned out. The trolling process is much faster than rerooting and I'm still getting used to it. I think I'm going to prefer working with yarn while trolling, instead of mohair or fibers. 

I hopefully will be able to update next week.


Friday, March 25, 2011

Re-rooting: The Part

If I being honest, I'd admit that doing a part on a Silkstone is the hardest task that I do while making over a doll.
Re-rooting Silkstone is very time consuming since I have to keep re-warming the head up to place the plugs. Getting a nice even part is very hard when you have to keep dunking the head and then drying it off.

Whenever I attempt a part (notice I use attempt) I alway going over Dan Lee's tutorial on re-rooting first: Wide Eyed Girls Re-Rooting Tutorial  I know the information by heart but I always find it inspiring to look and read a true artist's instructions first.

 Here is the doll before. (Notice I  changed the part to a more center location before starting.)
 The tools: Hair, Long Needle, Scissors, Rubber bands, a towel and HOT water

 Half the center part in place. It is nice and thick on one side and thin on the other. 

Before and After (with the finished part and the head placed back on the doll.)

Let me know what you think so far.


I had a question yesterday about removing  a Silkstone's heads. If it is like removing any other doll's head. It is very similar to removing other dolls' heads. However there are a couple of differences. (Anyone who removes a doll's head, does so at their own risk. )

a. The Silkstone head is made of very hard vinyl. You have to warm it up so it is soft before removing it. You can soak the head in hot water if you are not concerned with the hairstyle. OR you can wrap the hair with a cloth and use a heating pad to warm the head up. Both methods work well. Once the head is warm squeeze the head in at the ears and gently starting pulling it up. (If the head doesn't squeeze easily, warm it up more.)


b. The prong holding the head on is unique. It is made of plastic and it it can break or come out of the neck if you are not careful.

Here is a picture of Honey's body with the neck knob showing. Notice the neck knob looks like an arrow pointing up.

Hope this helps. Feel free to ask me any questions, I'll "try" and answer them.

Thursday, March 24, 2011

Getting the Re-root Started

So I haven't been around for about a week and a half. I do have a pretty good reason. My 2 boys that are homeschooled had their state testing. Now that doesn't sound huge, but it is. They each had to take Math, Reading and Grammar. Each test takes about 3 hours and it has to be done on "my" computer. (which is hooked up to the internet.) Not only did I have to watch them and make sure there is no cheating, but I had to keep the student not testing and the 2 toddlers quiet and happy so the tester could concentrate. (whew!)

Then yesterday, I had to give up an afternoon so I could take a class and test for my food service card. (For our youth football program.)

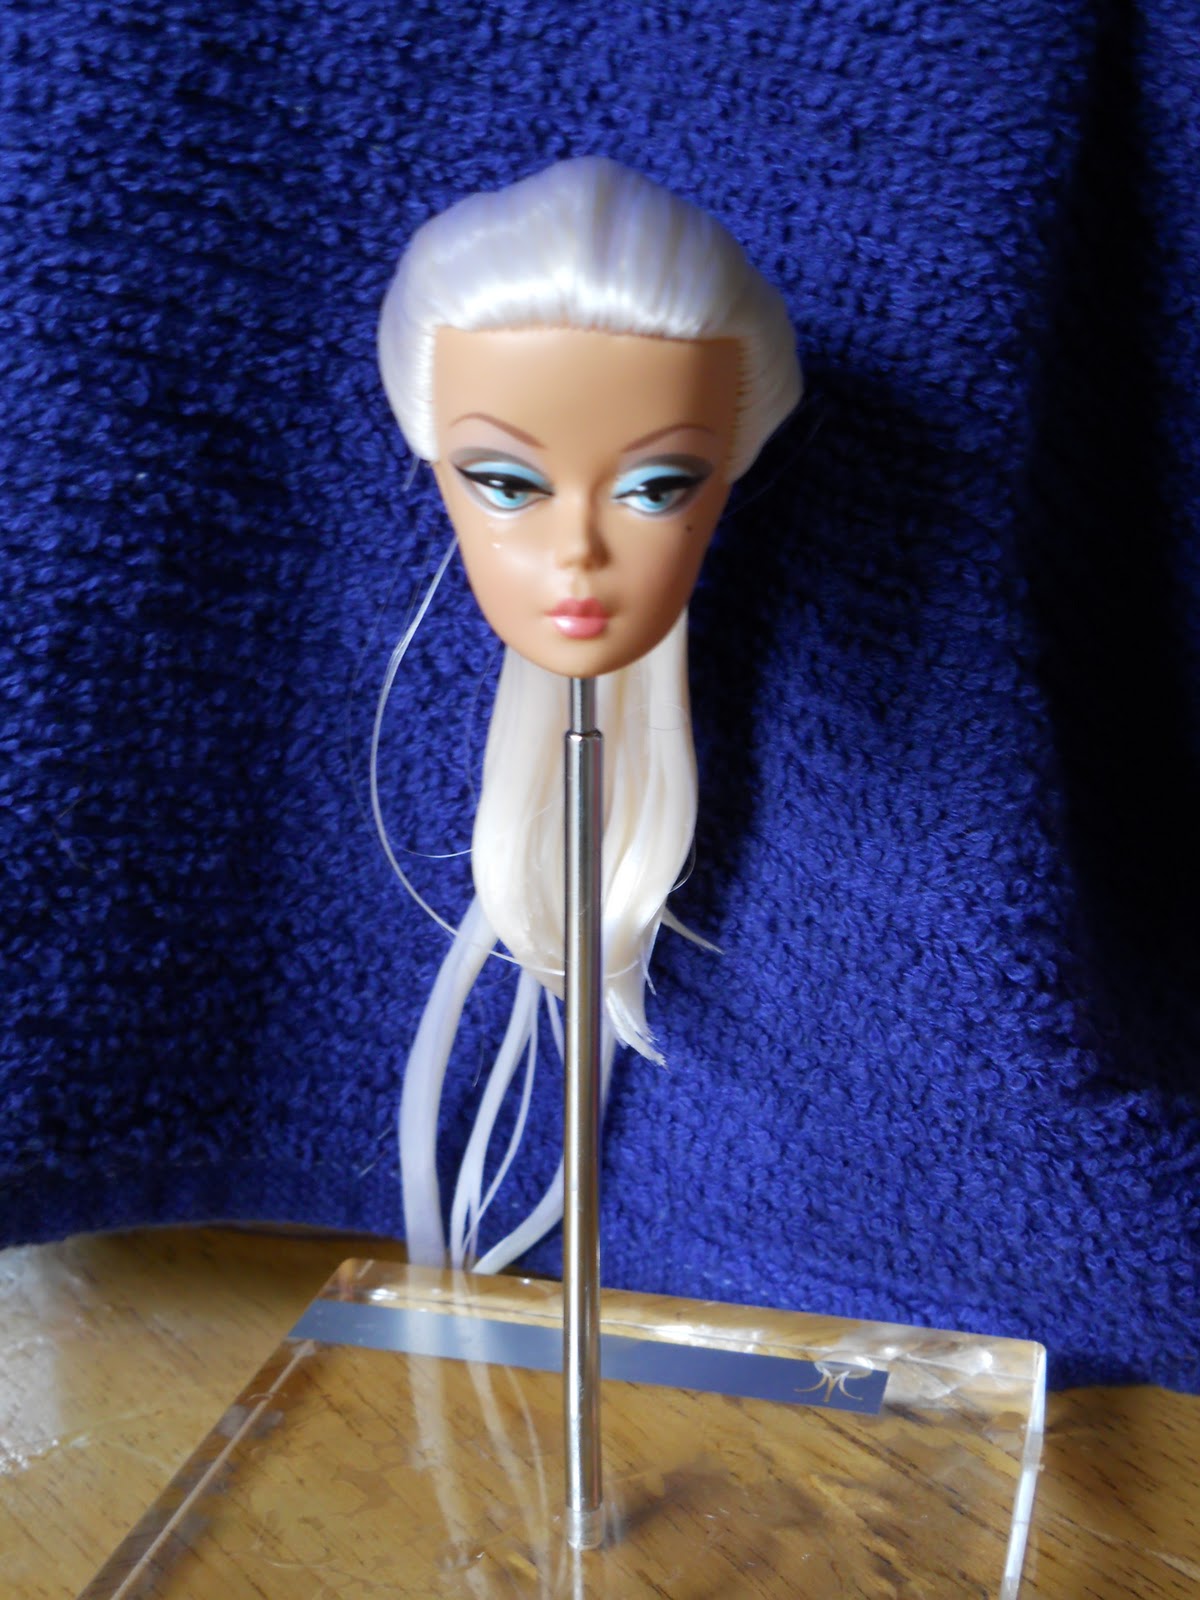
So today I'm back on track! :)  When I left you and Miss Honey, she looked like this:

I had removed her bangs only for her partial re-root. I will admit it is slightly easier to remove ALL the hair on the doll but since Honey has a hair color I like, it seemed silly to remove all her hair and spend days (weeks) putting the same color back in one plug at a time.

I used  a re-root tool, crochet hook, and a pair of tweezers to help me remove her bangs only.

Here is what I did: using the tweezers, I pulled as much if the bangs out as possible. I grab a few hairs as close to the head as possible and pull. (And keeping pulling.) Some plugs loosen up this way and the whole plug will come out. But with Honey all I did was break the hair very close to the head. Then I cut first row of plug and the leftover  bang hair as close to the hair as possible. 

Then using the crochet hook, I pulled at the bangs. I was asked how I could tell if I had the bangs or not. And it is really hard to tell sometimes. I did look in the head and knew about where to place the hook. It took a while but finally a whole clump of hair came out of her head. I then used the tweezers again to remove any hair left in the holes.
 Now for the re-rooting. I ordered my hair from Restore.com. I ordered 2 shades: Platinum blond and Snow White. I've learned if I don't know the exact color of hair to order a couple of shades, so you can better match the existing hair. (Honey's hair BTW is a perfect match for Snow White.)


The Supplies: The Head you are re-rooting. A Long doll needle (I normally buy one when I order hair), a fine tooth comb, the hair, a towel and a cup of hot (boiling) water. (Yep, the towel and hot water are necessary for re-rooting a Silkstone's head b/c the heads are sooo hard. The water softens the head so you can re-root it. The towel helps catch the water from the head, which will go every where.)


First place the head in the water to warm up. The first time I do this, I let it set 4-5 mins.
 (the warmer the head then easier it is to re-root and the less likely the vinyl will tear.) Each time after, I soak for about a minute or so. (When it gets to the point, you are soaking after each plug and it is hard to push the needle through the head, it is time to warm the water up again.)
 While the head is warming, place a "plug" of new hair through the needle eye.
 Once the head is warm, let it drain and then place the  needle through on of the holes.

Being careful, not to pierce the doll's head, pull the needle through the head. Then remove the needle from the plug, knot the plug and pull it back up through the head.

 A couple of plugs in
 A few hours later she is done. I used about half a bag of hair for this part of the re-root. And I had to re-heat  the water 3 times, to keep her head nice and pliable.

While her hair was still damp. I combed a part into it.I used the fine tooth comb and the needle to make the part as clean as possible.  (This is so I can re-root a part tomorrow.)

One other note:
  
This is a "re-rooting" tool I purchased from Dollyhair.com. And I have used it for the purpose of actually rooting plugs into a doll's head. With this tool, you just poke the hair into the head and then add a nice thick layer of glue to the inside of the head when you are done. It does a fairly good job and with the glue, it hold very tight.  But I have found out is is very useful to have around for other re-rooting methods. Right now, I have the re-rooting needle backwards, with the sharp point out. With the point out, I can poke my own holes in the doll's head, enlarge holes, and part the hair for plugs. So even though I don't use it as intended very often (mostly b/c Silkstone and FR heads are too hard for the tool.) I still like having it around.

Thursday, March 10, 2011

Hair, Hair Hair

Staying with the theme "Simple can be Better", I'm going to discuss hair today.

I found this Corduroy Cool Barbie at Goodwill. I won't even mention how evil my husband thinks goodwill is. I have found some very nice and rare dolls there over the last few months and since I'm out of room, I shouldn't be buying nude dolls at goodwill. That doesn't stop me if the doll is rare and in decent shape though. So David has this love-hate relationship with Goodwill. (He "loves" it when I drop stuff off, he "hates" it when I buy stuff there. It is the same relationship he has with eBay.)

This doll actually needs quite a bit of work in my opinion. She has missing hair plugs, she has an eyebrow rub, and her eyes need quite of bit of work. But all I've done so far is to wash her, switch bodies to a Fashionista body and comb her hair. (Now some people might be wondering why I'm not using Honey and I'll get to that later.)

One of the best (and most simple) hairstyles to learn is the "ponytail".
This ponytail is fairly simple, can be changed easily and some simple variations can make many looks.
The most important aspect of a good ponytail is that to pulled back part of the hair should be smooth (and not bumpy or ragged) . I use a very fine tooth comb and teeny-tiny rubber bands to make my ponytails. I often will dampen the hair to help with fly-aways. You also need to learn to center the "tail" on the head. (I know there are many side ponytails and pig tails styles out these but those need to be properly placed on the head too.) The great thing about a ponytail is position is everything. If you center the ponytail high up on the back of the head, an more glamorous look can be achieved. If the ponytail is centered lower, that is a more classic and timeless look.

I placed this ponytail on the upper part of the back of her head but kept it off her crown. I think it is a fun playful look.

Once your ponytail is in place there are several different looks you can achieve from this style.

You can twist the hair up into a bun:

You can add a rubber band to the bottom of the "tail" and roll is under for a classic updo:


Or you can roll the banded her upward to form a Balenciaga 50's Model" "do":


Both of the above dolls have a ponytail that has a small rubber band at the end of the tail and then rolled forward. It is a very useful style to learn.

And her is an update on Miss Honey, my project doll:


I have been busily working on prepping her for her partial re-root. Since I love her hair color, I decided a full re-root wasn't necessary. I've removed her bangs and I'm waiting for the new hair to arrive. (And I wish I would have had the forethought to take pictures of her for the hairstyle blog before ripping her bangs out :)  )

I will go over the basic process of removing her bangs next time. (And hopefully cover some basic re-rooting skills too.)

Wednesday, March 9, 2011

Sometimes Simple is Better

As an OOAK artist and collector I know that sometimes simple is better. Meaning you don't have to make major changes to every doll you own. Trust me once you go down the slippery slope of OOAK-ing, things can go downhill fast. It starts with a simple outfit change, then a new hair-do, maybe painting some new lip color over the old and BAMM! You are making at least minor changes to every single doll in the house.

I have found it helpful to only purchase dolls for a project. At one point, I was buying nude dolls like crazy for "one day". One day I'd love to re-root a Capucine into a Chantaine. One day, I'd love to repaint a Steffie mold. Oh, I love "so in so's" OOAK doll, I need to buy doll "X" so I can make my own version, one day. I'm a lot better now, though I do still have a box of "project" dolls in the hall closet, just waiting for me to get to them.

But you don't have to make major changes to a doll to make more unique or to change the look. Sometimes a simple change is all you need. Take Palm Beach Honey, my doll for this project,


I don't think the Yellow coloring of the outfit is very flattering to her skin tone or make-up palette. (Though the yellow does make the peach lips look more pink.)

By simply changing her outfit, you can get a more appealing look:

In white:


I think the color white works well with this doll. The white really shows of her skin color. It makes her platinum blond hair look blond, instead of white. The pale peach flowers on the dress, match her lips. The only thing that really stands out (and out of place) is her aqua eyeshadow.

In Aqua:
By matching the color of the dress to the eye make-up, the aqua now looks appropriate. The peach lips warm up the tone of the doll. (I love this color on her! In fact, it makes me wonder why this color instead of yellow was used. Or if the designer wanted to use yellow, then why wasn't a different face-up palette choosen.)

In Black:

Again by choosing a neutral color, the doll looks completely different and more pulled together. The black accents the skin-tone, make-up and hair color. I was surprised by how good this doll looked in black!

On a side note none of these dresses fit Honey. I had heard that the Palm Beach line of Silkstones was larger then the earlier lines and it is true. I couldn't button a single dress pictured and the black one was made for the Silkstone line.

This brings up another simple change that could have made the doll better. Lip color and hairstyle.

This is a picture of the 45th Anniversary Silkstone. She looks a LOT like Honey. There are a couple of differences though. 45th has the regular skin tone and pink lips and her platinum blond hair is in a ponytail. I really like this doll and think she works a lot better then Honey.


So small changes can make a big difference if you don't like a doll straight out of the box. Redressing can greatly improve a doll, as can simple hair styling which I'll go over tomorrow.